Keyframes
Animation: from keyposes to keyframes
Keyframe animation is one of the oldest principles of creating computer graphics, drawing inspiration from traditional 2D animation, which itself is based on two main concepts:
- Pose to Pose Animation (as opposed to "Straight Ahead Animation")
- Inbetween images, also called "intervals"
Pose to Pose Animation consists of only drawing key positions during a movement, like the extreme positions of an arm during its swing. This lets you better anticipate the movement in time, and allows you to know the duration and the structure of a movement before defining its details.
Once this basic animation is complete (left) thus validating the intended movement, intermediate images are drawn (right), to make the animation more fluid.
The same principle applies today in the field of computer animation. Users can define key values for one or more parameters at specific points in time, and the software will calculate the intermediate images by interpolating these values.
Keyframes in Autograph
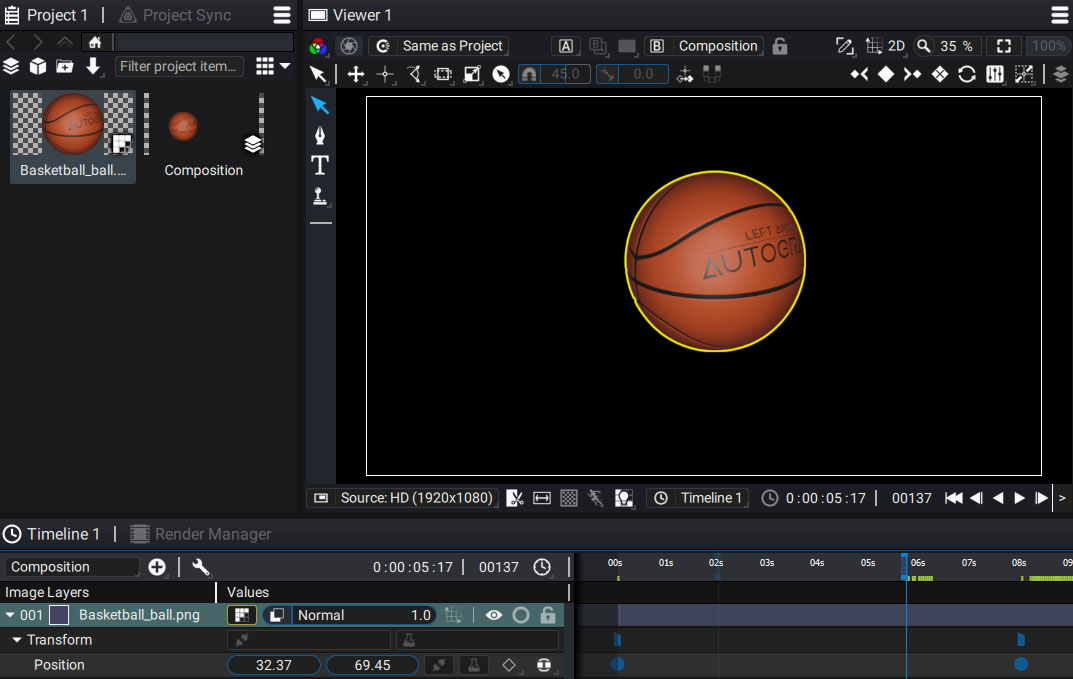
To practice using keyframes while reading this documentation, you can download this Autograph basketball ball and follow along.
In order for keyframes to be visible in Autograph, make sure that the Dope sheet module is used in the Timeline, which is the case by default when the software is started. If not, click on the button on the right to select this module.
Keyframes can be added to parameters that can be animated. Parameters that can be animated are easily identifiable by the empty square on the right.

Adding keyframes
This square means that this parameter is "animatable" and that it does not currently contain an animation. To add a keyframe to the current time defined by the playhead, just click on this square to display a pie menu, composed of 4 parts.

By moving the mouse upwards, we reach a diamond-shaped icon that lets us add a keyframe on the parameter. Once added, the pie menu closes and the square is replaced by a solid diamond, indicating that the parameter is animated, and that a keyframe exists at the current time.

If the playhead remains at the current time and the Position values are changed, the keyframe at that location will be updated with these new values. To create a new keyframe, simply move to a time in the Timeline that does not have a keyframe on this parameter and change the values. A new keyframe will be created automatically. This change can be done either by changing the numerical values of the parameter or, in the case of Position, by moving the layer in the Viewer.
Keyframe type
The almost universal symbol used by all software to define a keyframe is the diamond we clicked on initially; but historically, this diamond was the only interpolation type that existed when this concept first appeared, known as Linear IntERPolation (also known as LERP).
You can see that the keyframes drawn in the Dope sheet part are not diamonds, but circles. This is because these keyframes are not of the LERP type by default, but of the Custom type.
The default values for the tangents, however, make it a linear motion, similar to what a LERP type might produce, as can be seen in the Graph Editor.
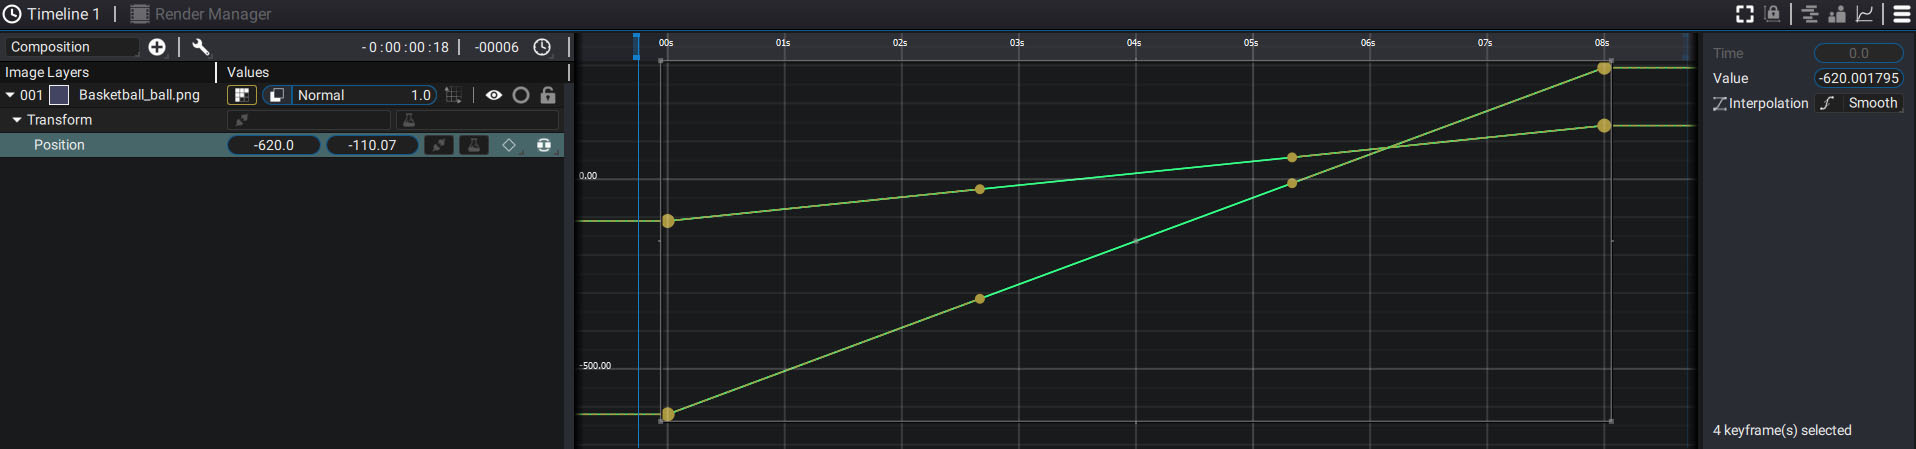
Since these keyframes are in Custom mode, it is possible to quickly move their tangents to bend the curves.
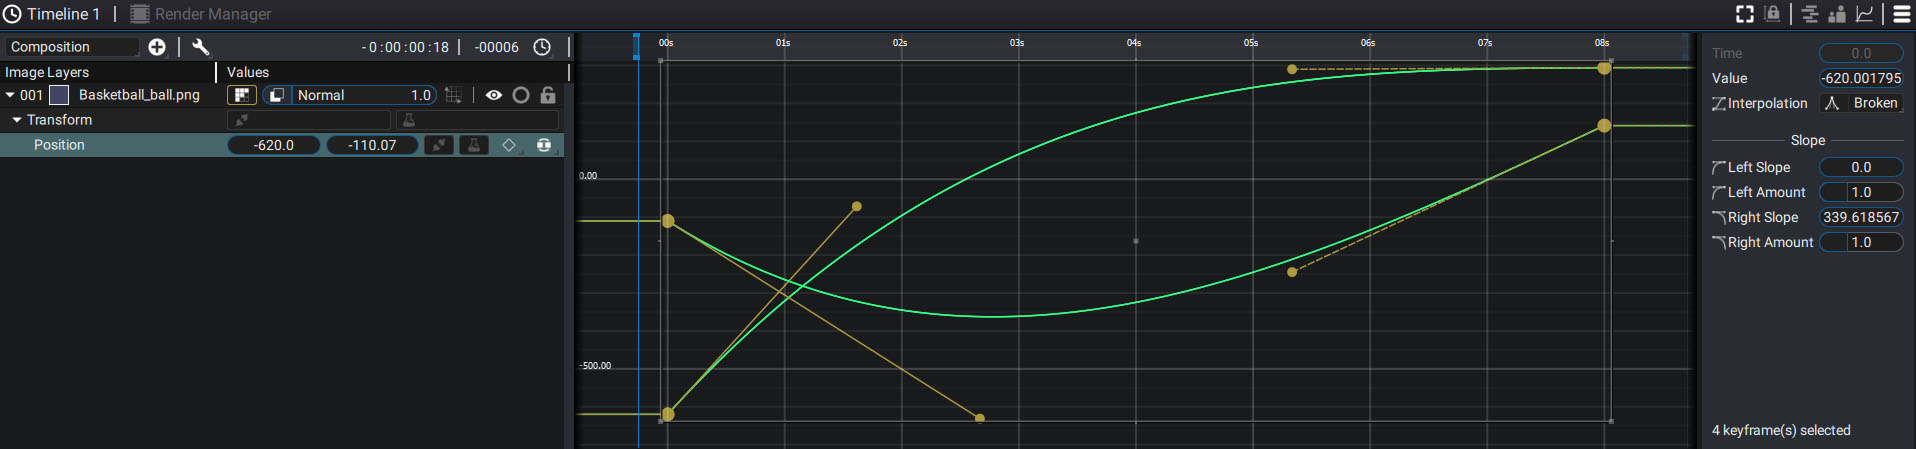
If the Linear interpolation mode is chosen from the almost 50 interpolation modes Autograph provides, then the keyframes will be represented by a diamond.

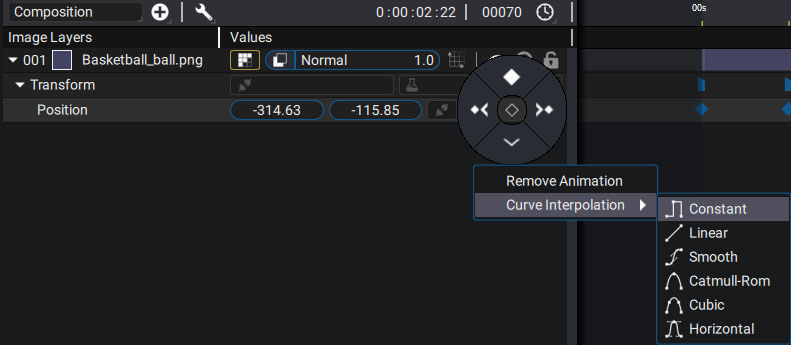
If you want to assign the same interpolation mode to all keys of an animation curve, there is a menu containing the most common types of curves in the pie menu where you can then click on the downward pointing arrow.
Navigating keyframes
The pie menu that appears when you click the keyframe icon allows you to perform several actions with a single controller:
- If no keyframe exists at the current time: add a keyframe
- If a keyframe exists at the current time: delete the keyframe
- Move to the nearest keyframe before the current time
- Move to the nearest keyframe after the current time
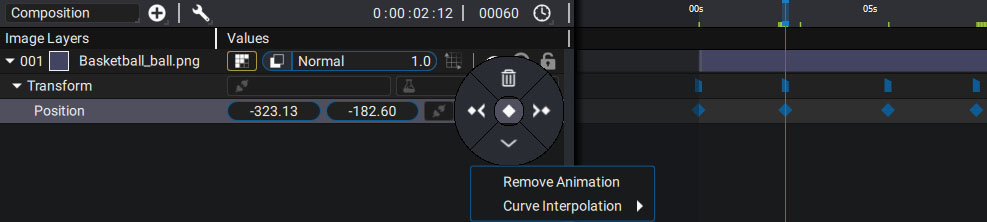
After clicking on one of the buttons, the pie menu will close automatically. To leave it open and click on the same button more than once, hold down the Ctrl/Cmd key.
To display the keyframes used by the parameters of the selected layer(s), press the U key.
Snapping
When moving keyframes, pressing the Shift key enables snapping, based on:
- The playhead
- Other keyframes, including visibility ones.