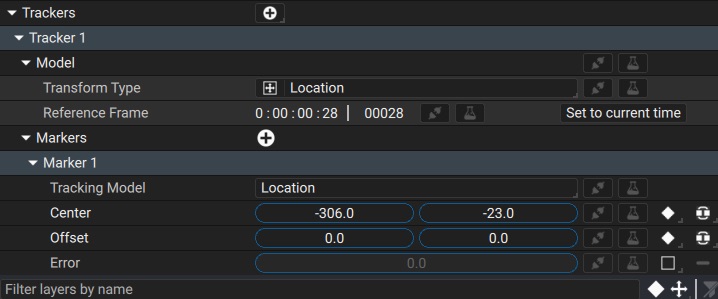
Point Tracking
If you didn't read the Overview section yet, please do so before reading the following. We will walk you through point tracking the streetcar shot as illustrated in the Overview section.
Let's go ahead and add a point tracker on the layer:
![]()
When reviewing the motion of the shot, we can see that the sides of the streetcar move in a perspective motion. Notice that the streetcar windows not only show reflections but they also reveal the background behind them, so trying a track in these regions is highly likely to fail.
Before adding a new marker, we will first set the New Marker Model setting to Perspective since all of the markers we want to track need to track a perspective motion.
![]()
Note that this can be changed on each marker afterwards by changing the marker's Tracking Model parameter.
The marker's Tracking Model indicates what type of motion it should try to track for this marker only. This is not the same as the Model Transform Type parameter, which we will go through in the section below.
Adding Markers
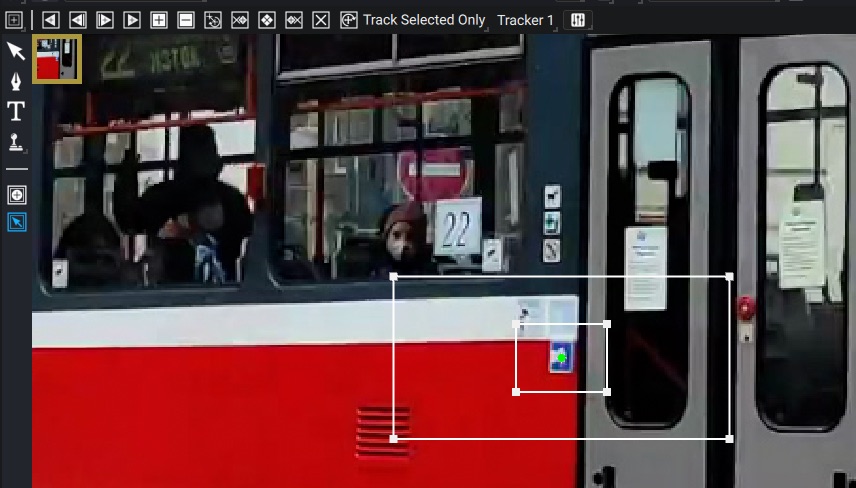
Adding a marker can be done directly in the Viewer by activating the add mode on the left toolbar and clicking on the desired spot in the image.

Note that the marker user interface allows you to control the following marker parameters:
- The center (or tracked point) of the marker is the small cross in the middle of the marker
- The inner rectangle with 4 corners represents the pattern window: this is what you want to track. Note that the 4 corners do not have to be a rectangle: when tracking a perspective model, the 4 corners will move freely, like a CornerPin..
- The outer rectangle represents the search region: this is how far it will look to the next/previous frame when tracking. If the motion of the shot is very large between each frame, it may fall outside the search window and fail to track.
The marker also has an Offset parameter, which we will go over later, but that can be moved in the Viewer by dragging the center point while holding down Ctrl.
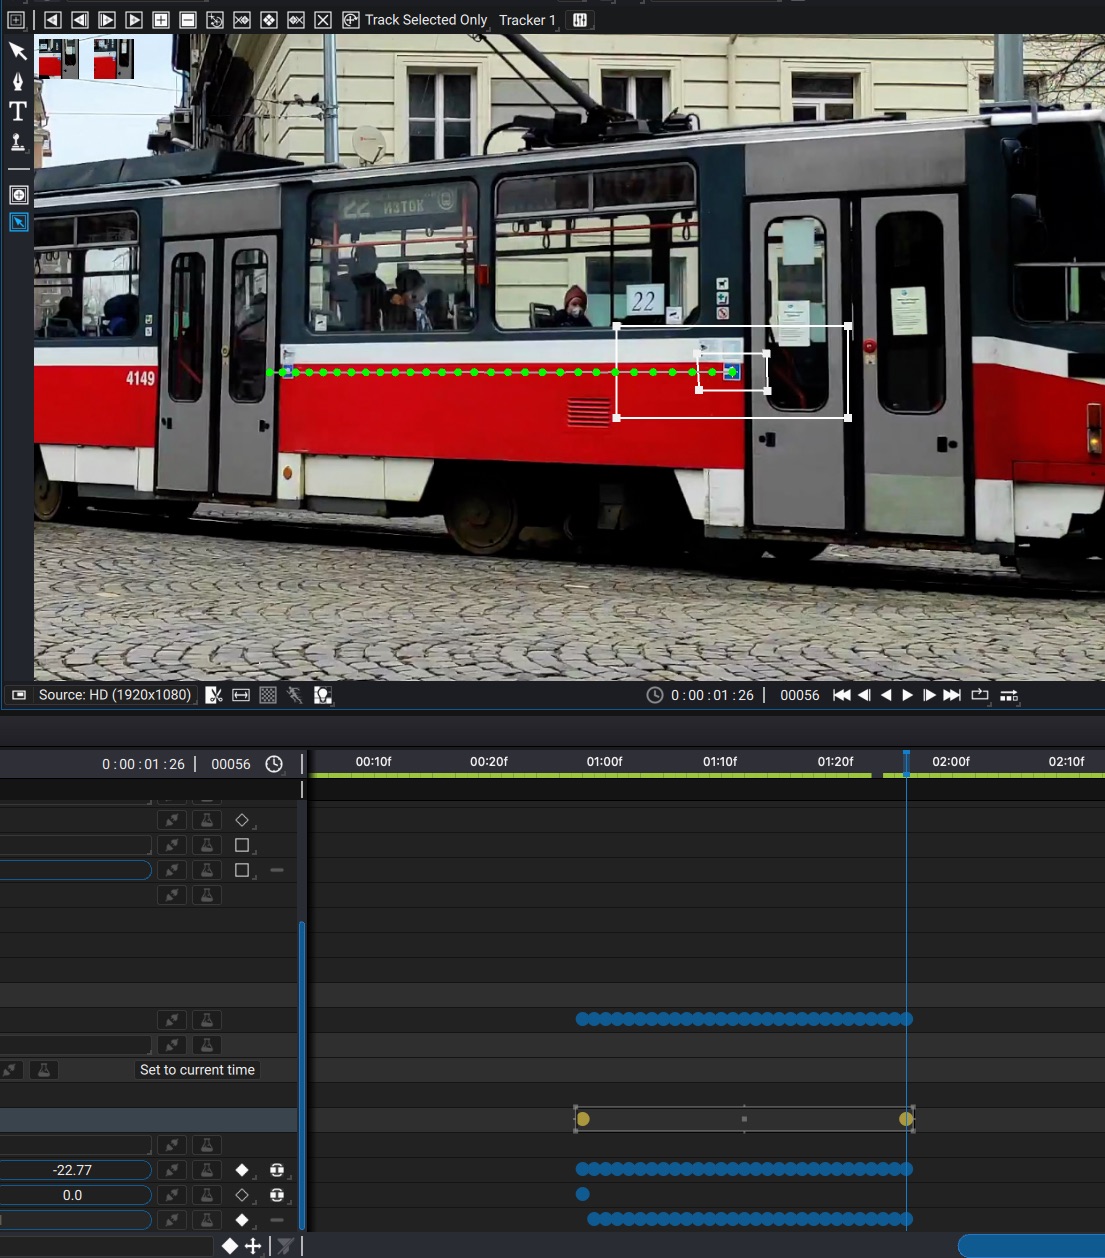
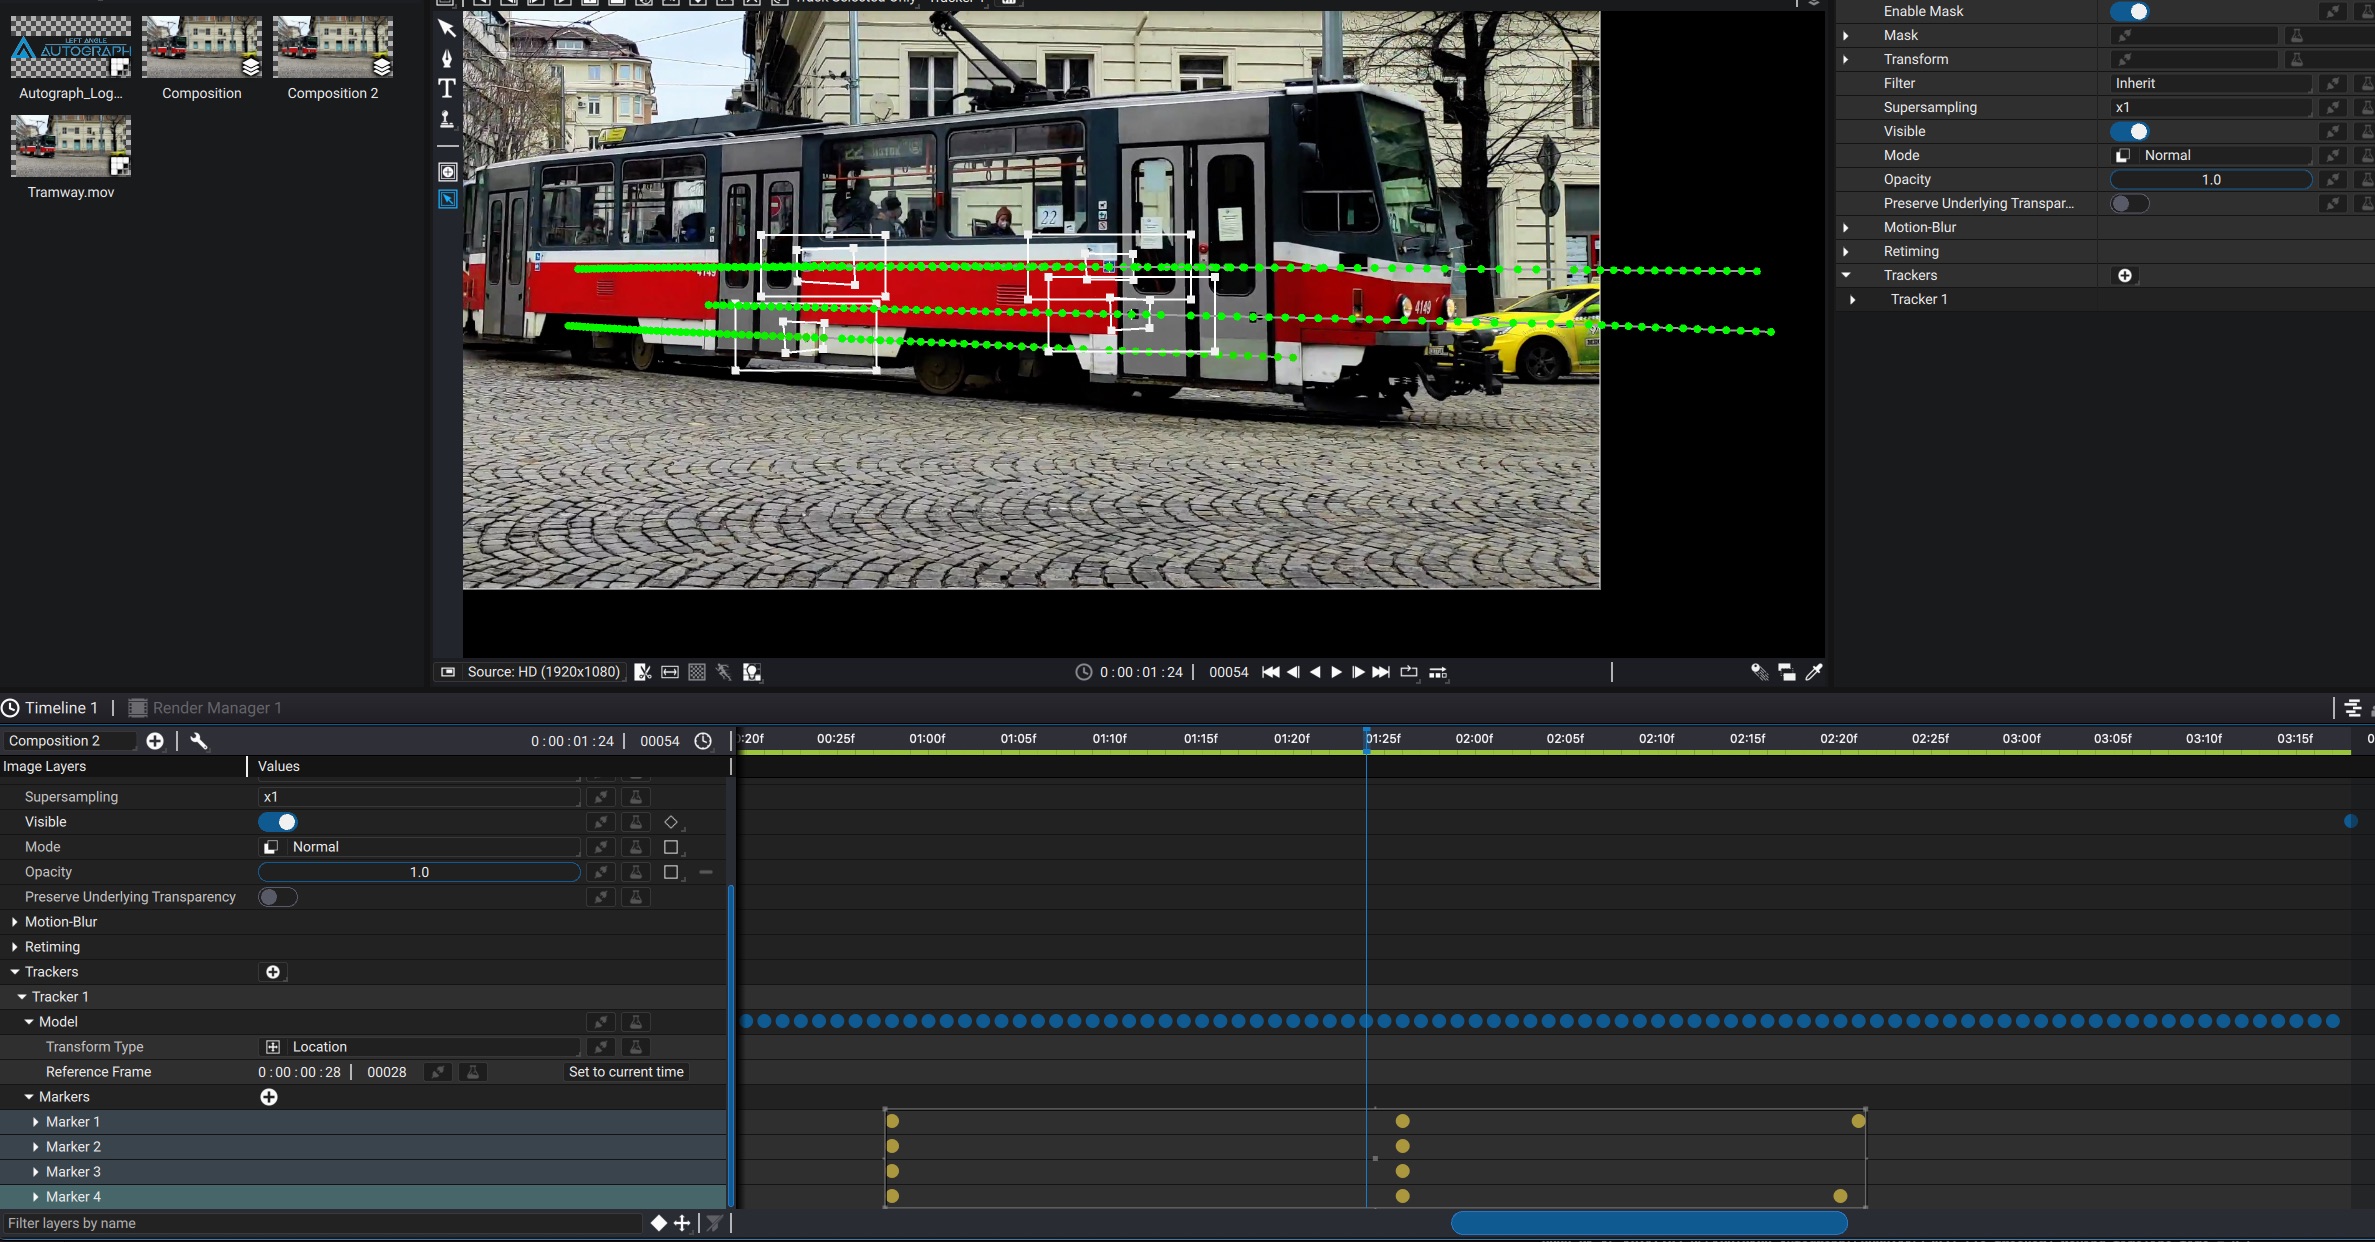
Whenever you add the marker for the first time, you also set a pattern keyframe, visible on the Timeline row of the Marker.

The pattern keyframe will be the reference used for tracking the next frames (when tracking forward, otherwise previous frames when tracking backward), until the next pattern keyframe is encountered. You can remove the pattern keyframes from the Timeline or from the top toolbar of the Viewer as needed. Note that you need at least one keyframe in order to track correctly.
Pattern keyframes are usually added on clear frames with a lot of detail where the tracker is most likely to find similarities with the tracked frames. If the content of the tracked object changes significantly over time, consider adding a new pattern keyframe.
Motion Model
Depending on what kind of model transform type you want to use to match move other elements (or stabilize the footage), different scenarios are possible to perform the tracking:
- Tracking a Location model only requires a single point to track.
- Tracking a Location+Rotation or Location+Scale requires at least 2 points to track
- Tracking a Location+Rotation+Scale or Affine requires at least 3 points to track
- Tracking a Perspective model requires at least 4 points to track
The minimum number of markers to track is a minimum: the more markers you track that have a similar motion, the more accurate the resulting motion will be.
In Autograph, you will notice that when tracking a marker with a Tracking Model other than Location, the 4 corners of the marker pattern will be deformed. In this case, it is possible to use a single marker to track a model requiring multiple points since it already tracks 4 corners + center. However, tracking multiple markers that follow the same motion may yield stronger results, depending on the shot.
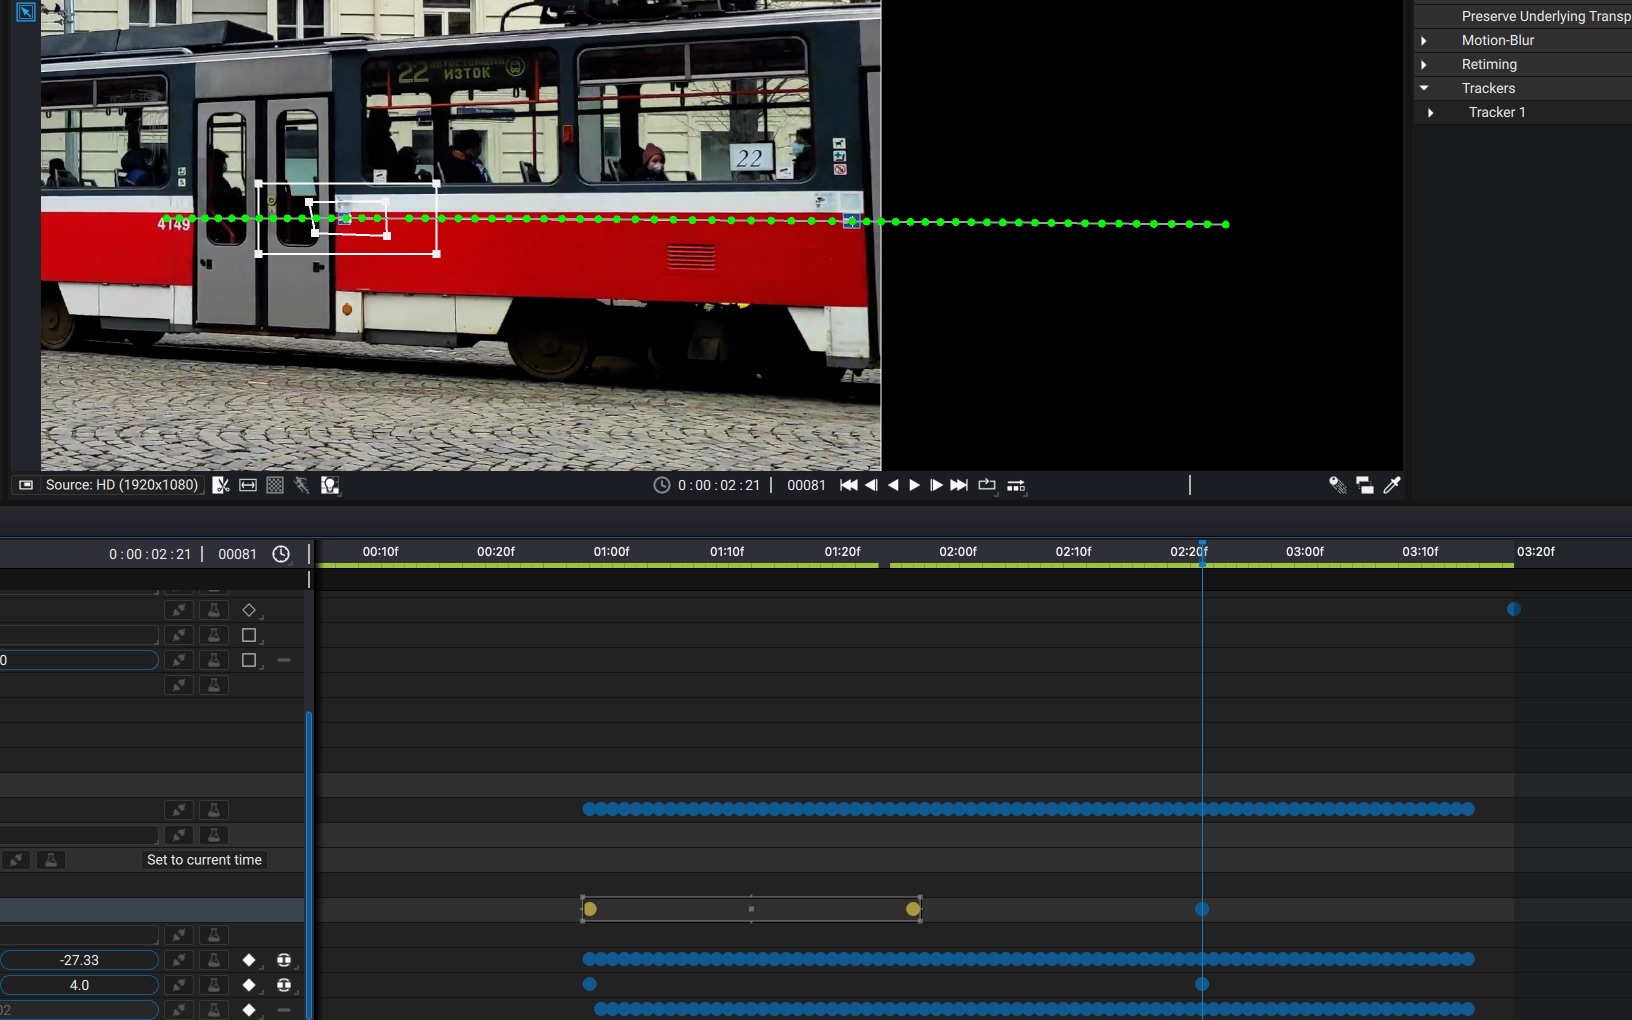
Tracking
To start tracking, you may need to select the desired markers when the Track Selected Markers mode is selected in the top toolbar of the Viewer. Let's increase the marker search window horizontally, since the streetcar is moving faster per frame than the default 20px setting.
In our case, since we created the first pattern keyframe in the middle of the sequence, we will need to both track forward and backward using the buttons from the top toolbar of the Viewer.
What to do when the tracker stops
After tracking a few frames, the tracker stopped.
What we can do here is try to change the following parameters and start tracking again from the failed frame:
- Increase the search window again: since the pattern may have gotten bigger, the search window may get too small
- Check Normalize Intensities in the tracker settings menu: since our shot contains a few reflections and lighting changes may help this.
- Increase the maximum number of iterations: sometimes when the reference pattern keyframe is very different from the frame to track, the tracker needs to internally perform a lot of searches, which are bound by this parameter.
- Add a new pattern keyframe by clicking on the corresponding button in the toolbar: this will help as the next frames to track are closer to the new keyframe and are likely to find a match more easily.
If it still continues to fail, consider tracking another point of the shot that follows the same motion. Remember that the tracker needs to have textured elements with edges: a flat surface such as a poorly lit green screen without any features will be impossible to track.
In our case, the problem was a search window that was too small. Let's launch the tracker again.
Reaching the edge of the frame
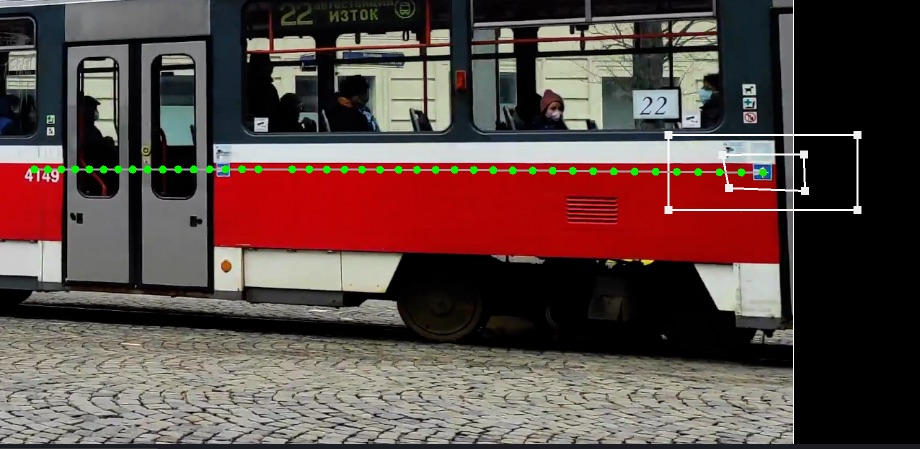
The tracker successfully tracked the marker until it reached the edge of the frame, where it began to be out of sight, causing the tracker to unsuccessfully find a corresponding match.
This is where the marker's Offset parameter comes in handy: you can drag it using Ctrl when moving the center of the marker.
What we are going to to do is offset the marker to another feature following the same motion but that is still in the shot. The tracker will apply the offset and apply it to the marker's original center.
Once all points following the same motion are tracked, we can move on to apply the tracked model.